How to Drip Acclimate Neocaridina Shrimp
A calm, careful acclimation is the difference between stressed shipments and shrimp that arrive healthy and ready to thrive. Follow this simple drip acclimation guide to safely introduce Neocaridina shrimp to your aquarium.
Why drip acclimation matters
Neocaridina shrimp are hardy, but rapid changes in temperature, pH, and water chemistry can shock them and cause stress or mortality. Drip acclimation helps shrimp gradually adjust to your tank’s conditions so they arrive healthier, settle faster, and begin feeding and breeding sooner.
Before you start: your tank should be fully cycled. “Cycling” establishes beneficial bacteria that convert ammonia and nitrites (toxic to shrimp) into less harmful nitrates. If your tank isn't cycled yet, pause acclimation until you complete that step. For this guide, we assume your tank is already cycled and stable.
Ideal water parameters for Neocaridina
Keeping your tank near these ranges will help your shrimp stay healthy and colorful:
- Temperature: 74°F to 80°F
- pH: 7.0 to 8.0
- GH (General Hardness): 6 to 10 dGH
- KH (Carbonate Hardness): 4 to 6 dKH
- Ammonia & Nitrite: 0 ppm (undetectable)
- Nitrate: Below 20 ppm
What you'll need
Gather these items before you begin:
- A clean bucket or container (separate from your main tank)
- Airline tubing (2–3 feet)
- A valve, clamp, or a knot in the tubing to control flow
- Net for transferring shrimp
- Towels (for spills)
Step-by-step drip acclimation
Step 1 — Temperature equalization (15–20 minutes)
Float the sealed bag in your tank for 15–20 minutes to let the temperature equalize. When floating the bag, dim your tank lights or turn them off, shrimp are less stressed in lower light and the process will be calmer.

“When floating the bag, dim your tank lights or turn them off. Shrimp are less stressed in lower light, and it helps them adjust more calmly while the temperature equalizes.” — Dallas Davis
After temperature equalization, gently open the bag and pour the shrimp and shipping water into a clean bucket or container. Do not pour shipping water directly into your aquarium, it can contain waste or unwanted bacteria.
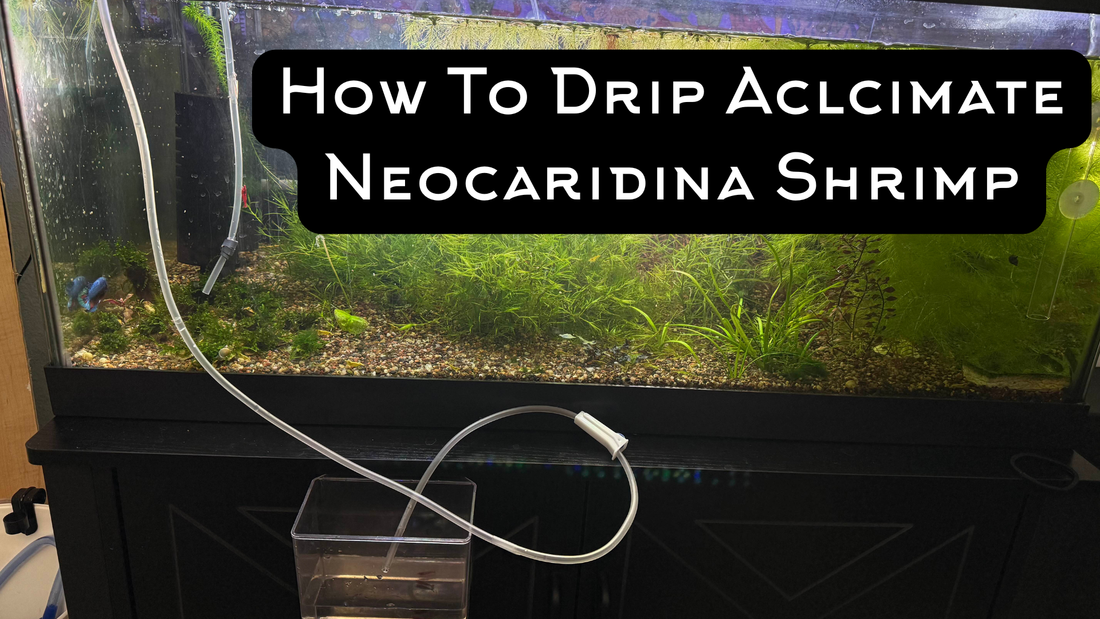
Step 2 — Start the drip
Attach the airline tubing to your aquarium and start a siphon into the bucket. Use a valve, clamp, or a tight knot to slow the flow to about 2–4 drops per second. This slow drip gradually mixes your tank water with the shrimp’s shipping water.

Step 3 — Continue until volume doubles (1–2 hours)
Allow the water to drip for 1–2 hours, or until the bucket’s volume has at least doubled. Keep the bucket in a quiet, dimly lit spot to minimize stress. This gradual adjustment helps shrimp adapt to your tank’s temperature, pH, and hardness.
When acclimation is finished, gently net the shrimp and place them into your tank. Avoid pouring the shipping water into your aquarium.

Tips & best practices
- Be patient: Don’t feed immediately after transfer, give shrimp time to explore and settle. Some shrimp will hide at first; that’s normal.
- Low light: Dim lighting during acclimation reduces stress and encourages a calm transfer.
- Quiet environment: Keep the bucket away from loud noises, strong vibrations, or curious pets.
- Don’t rush the drip: Fast acclimation defeats the purpose, slow and steady wins.
Troubleshooting
If you notice any unusual behavior after transfer (excessive lethargy, gasping, or loss of color), check these items immediately:
- Confirm water parameters in your tank (pH, temp, ammonia, nitrite, nitrate).
- Make sure the tank is fully cycled.
- Look for sharp differences in GH/KH that might stress shrimp — try to match general hardness where possible.
- If a problem persists, isolate affected animals and consult experienced keepers or your supplier for guidance.
Final thoughts
Drip acclimation is a small investment of time that returns big benefits: healthier shrimp, less stress, and a higher chance they’ll start eating and breeding in your tank. With a calm approach and the steps above, you’ll give your Neocaridina the best start in their new home.
Congratulations! You’ve successfully drip acclimated your Neocaridina shrimp. You can Download The PDF Guide here.